
How to Replace a Garage Door Spring: Torsion & Extension Repair Guide
A broken garage door spring is one of the few home repairs that combines real physical risk with a genuine temptation to save money by doing it yourself, because the parts themselves are inexpensive while the tension they hold is not.
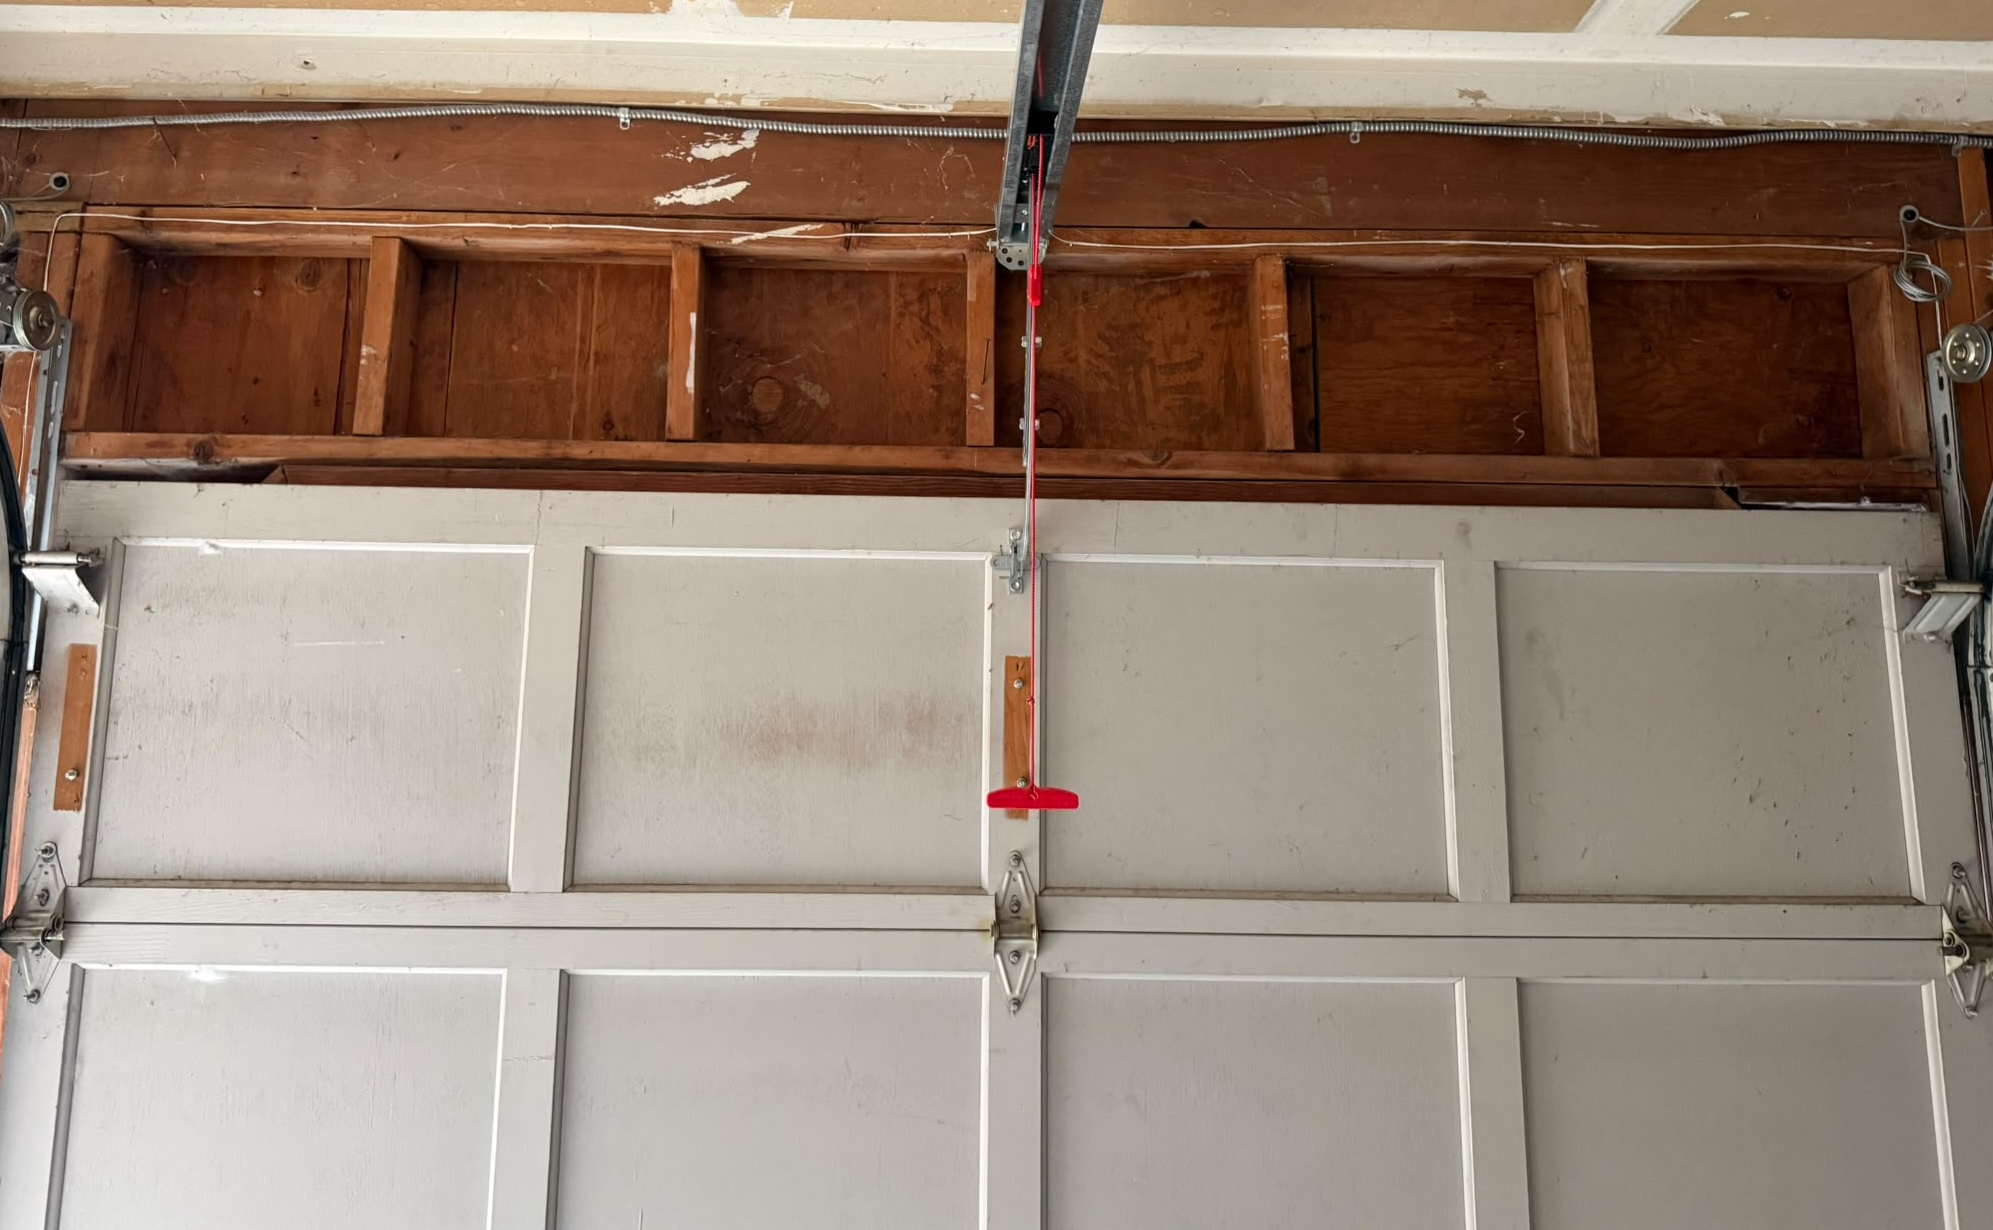
This guide walks through how to replace garage door spring components safely, covering how torsion and extension systems differ, when garage door spring replacement is safe to attempt at home versus when it belongs to a licensed technician, and what the process costs in Washington and Florida.
By the end of this article you will feel more prepared to decide whether to pick up a winding bar yourself or schedule a professional visit, and either way, to understand exactly what the job involves.
Signs Your Garage Door Spring Needs Replacing
A garage door spring rarely fails without warning, which is why homeowners who pay attention to a handful of early symptoms can usually schedule a repair before facing a full garage door spring broke scenario that leaves the door unsafe to operate. The most common early sign is a loud bang coming from the garage, often mistaken for something falling off a shelf, which is actually the sound of a torsion spring snapping under load. Beyond that single dramatic moment, several gradual clues tend to appear over the weeks before a full failure:
- The door feels noticeably heavier when lifted manually, because the spring is no longer offsetting the panel’s weight, which for a standard 16×7 double garage door can run 130 to 400 pounds depending on material and insulation.
- The door hangs unevenly, appearing crooked or tilted to one side when partially open, which points to one spring in a two-spring system having lost tension while the other is still intact.
- Visible gaps in the spring coils, rust streaks, or a stretched-out extension spring are all signs of metal fatigue that precede failure.
- The opener strains, grinds, or trips its safety reversal repeatedly, because the motor is compensating for tension the spring should be providing.
- The door will not stay open on its own or slams down faster than usual, which indicates the counterbalance system has already partially failed.
Industry data shows that standard residential torsion springs are rated for roughly 10,000 cycles, translating to about seven years of service for a household opening the garage door four times daily, while high-cycle springs rated at 25,000 to 100,000 cycles can last considerably longer\[web:15\]. Extension springs generally wear out faster, with typical ratings of 7,000 to 15,000 cycles, which is why they often need replacement several years sooner than a comparable torsion setup\[web:4\]\[web:7\]. Recognizing these warning signs early allows a homeowner to plan broken garage door spring repair on their own schedule rather than face a garage door that is stuck shut on a Monday morning.
Torsion Springs vs. Extension Springs: Key Differences
Not every garage door spring works the same way, and understanding which type is mounted on a specific door changes both the replacement procedure and the safety precautions involved. Torsion springs are mounted horizontally on a metal shaft directly above the closed door and store energy by twisting, while extension springs run along the horizontal tracks on either side of the door and store energy by stretching as the door closes.
| Feature | Torsion Spring | Extension Spring |
|---|---|---|
| Mounting location | Shaft above the door opening | Along horizontal tracks, one on each side |
| Energy storage method | Twisting (torque) | Stretching (tension) |
| Typical cycle life | 10,000-20,000 cycles (\\\~7-14 years) | 7,000-15,000 cycles (\\\~5-10 years) |
| Door balance and feel | Smoother, more controlled lift | Can bounce if springs are mismatched |
| Safety profile | Failure contained on the shaft | Requires safety cables to prevent violent snapping |
| Typical installed cost | $75-$150 per spring | $50-$100 per spring |
| Common on | Most newer residential and commercial doors | Older or entry-level residential installations\\\[web:9\\\]\\\[web:16\\\] |
Torsion springs are generally considered the safer and longer-lasting design because their failure mode stays largely contained on the shaft, whereas a broken extension spring without a properly installed safety cable can become a projectile capable of causing serious injury\[web:16\]. A torsion spring replacement is also typically faster for a professional to complete than sourcing matching parts for an older extension system, which is one reason garage door torsion spring repair requests make up the majority of service calls Skyline receives across both states. That said, extension springs remain common on older garages and low-headroom installations where there is not enough clearance above the door for a torsion shaft, so having one on a garage door is not automatically a sign of an inferior setup. A quick way to tell them apart is to look above the closed door for a single shaft running the width of the opening, which indicates torsion springs, or to check for two long springs running along the upper tracks, which indicates an extension system. Identifying the correct type before ordering parts prevents the single most common and costly mistake in this project: buying a replacement that does not match the existing system.
Should You Replace the Spring Yourself or Call a Professional?
Garage door springs under full tension store enough energy to break bones, and this is not a scare tactic but a documented risk that emergency rooms treat every year, which is why deciding whether garage spring repair belongs on a DIY task list deserves an honest weighing of both paths rather than a blanket recommendation either way.
Reasons to Consider a DIY Approach
- Parts alone typically cost $30 to $100 per spring, compared with $150 to $350 for a professional visit that includes labor, meaning a confident homeowner tackling repair garage door spring work personally can save a meaningful amount\[web:2\]\[web:12\].
- Homeowners with mechanical experience, the correct winding bars, and a helper on hand can often complete a torsion spring swap in two to four hours.
- The process, while dangerous if rushed, is well documented and repeatable once the correct spring size and wind direction are confirmed.
Reasons to Hire a Licensed Technician
- A technician carries insurance that covers accidental damage to the door, opener, or vehicle, which most homeowner policies do not extend to a self-inflicted repair mistake.
- Professionals arrive with winding bars sized correctly for the specific cone and routinely replace both springs together even when only one has failed, preventing an uneven, short-lived repair.
- A licensed technician can inspect cables, rollers, and opener force settings during the same visit, catching secondary problems a first-time DIYer is unlikely to notice.
- Same-day and emergency scheduling means a professional repair often restores full use of the garage within hours, without the learning curve of a first attempt.
At Skyline Garage Door Repair, we support homeowners who are comfortable and properly equipped to handle routine maintenance themselves, while making clear that torsion spring work carries a genuinely elevated injury risk compared with most other DIY home projects. Our licensed technicians in both Washington and Florida are available for 24/7 emergency response, so a stuck or unsafe garage door does not have to wait until a homeowner feels ready to attempt the job solo. The right choice ultimately depends on comfort level with hand tools under tension, not on cost savings alone, because a mishandled spring can turn a modest repair into a far more expensive emergency.
Tools and Safety Equipment You Will Need
Attempting to fix garage door spring tension without the correct tools is the fastest way to convert a routine repair into an accident, because generic hardware such as screwdrivers or undersized bars cannot control the force a wound spring releases.
Essential Tools for the Job
- A pair of properly sized winding bars, typically 1/2-inch by 18 inches, matched exactly to the winding cone holes on the spring
- Locking pliers or C-clamps to secure the door track and prevent unexpected movement
- An adjustable wrench and a socket wrench set for the center bracket and set screws
- A sturdy ladder rated for the reach required, positioned on level ground rather than on furniture or boxes
- Safety glasses and work gloves, since flying metal fragments and pinch points are the two most common sources of injury
- A tape measure and a permanent marker for measuring spring dimensions and marking shaft position before disassembly
Critical Safety Precautions
Before any tool touches the spring, disconnect the garage door opener from its power source and manually disengage the trolley so the motor cannot activate unexpectedly during the repair. Close the door completely and clamp the track just above the rollers on both sides, which keeps the door from dropping or rising while the spring assembly is disassembled. Never substitute a screwdriver or an undersized rod for a properly fitted winding bar, because a bar that slips out of the cone under tension can whip upward with enough force to break fingers or strike the face. Taking twenty extra minutes to gather the correct equipment before replacing garage door spring hardware is the single most effective way to keep this repair from becoming dangerous.
Measuring and Choosing the Correct Replacement Spring
Ordering the wrong spring is the most frequent and expensive mistake homeowners make when researching how to install garage door springs on their own, because a spring that is even slightly undersized will leave the garage door heavy and prone to further damage, while an oversized spring can make the door dangerously difficult to control when opening manually.
To measure an existing torsion spring accurately, keep fingers and tools away from the winding cone itself and record only the coil body’s dimensions:
- Wire diameter, measured with a caliper or by comparing against a reference chart
- Inside coil diameter, measured across the open center of the spring
- Overall length of the coiled body, excluding the winding cones
- Total number of coils, which helps confirm the wire gauge with a supplier
- Wind direction, since torsion springs are manufactured as either left-wound or right-wound, and mounting one on the wrong side of the center bracket will prevent the door from balancing correctly regardless of how well it is installed
This distinction matters just as much for a garage door tension spring replacement as it does for a torsion system, since extension springs are sometimes labeled as tension springs interchangeably by suppliers and the wrong length will cause the same balance problems either way. As a general reference, a standard 7-foot single-car garage door typically uses one torsion spring rated for the door’s weight class, while most double-car doors up to 16 feet wide use two springs working in tandem, though the exact wire size depends on door weight, track type, and headroom clearance rather than door width alone. Door weight is the variable homeowners most often underestimate, because an insulated steel door can weigh significantly more than an uninsulated equivalent of the same dimensions, which means a spring taken from an older door will almost never provide correct balance on a newer, heavier replacement. When in doubt, weighing the door with a simple platform scale positioned under one corner while it is disconnected from its springs gives a far more reliable answer than guessing from the old spring’s specifications, since roughly one in ten garage doors on the market is fitted with an incorrectly matched spring from the factory or a prior repair.
Step-by-Step: Replacing a Torsion Spring
A garage door torsion spring replacement follows a defined sequence, and skipping steps or reversing their order is where most DIY injuries occur, so following each stage in order matters as much as performing any individual step correctly when you replace garage door torsion spring hardware.
- Secure the door and disconnect power. With the garage door fully closed, unplug the opener, disengage the trolley, and clamp the track above the rollers on both sides using locking pliers.
- Mark the shaft and drum position. Using a permanent marker or file, mark the torsion shaft and cable drum at each end so the door can be re-leveled correctly once new springs are installed.
- Insert winding bars and release tension gradually. Insert one bar fully into the winding cone, then insert a second bar into the next hole before removing the first, unwinding the spring one quarter turn at a time rather than all at once.
- Loosen the center bracket set screws only after tension has been fully released, then slide the old spring off the shaft.
- Inspect the shaft, cable drums, and end bearing plates for wear while the system is disassembled, since this is the easiest opportunity to catch a worn bearing before it causes a future breakdown.
- Slide the new spring onto the shaft, oriented with the correct wind direction toward the matching side of the center bracket, and loosely secure the set screws.
- Wind the new spring in quarter-turn increments using both bars, counting turns according to the manufacturer’s specification, typically between 7 and 10 full turns for a standard residential garage door.
- Tighten the set screws firmly once winding is complete, applying even pressure to avoid stripping the shaft.
- Remove the clamps, then lift the door manually to check balance before reconnecting the opener.
If the door feels too heavy when lifted by hand, additional winding is likely needed; if it wants to fly upward on its own, the spring has been overwound and should be backed off slightly. Only once manual operation feels smooth and controlled should the opener be reconnected and tested through several full cycles, listening for grinding or uneven motor strain that would point to a misalignment elsewhere in the system.
Step-by-Step: Replacing an Extension Spring
Replacing garage door springs of the extension type is mechanically simpler than torsion spring work but carries its own distinct hazard, because these springs stretch under load rather than twist, and a spring without a properly threaded safety cable can snap free and travel the length of the track at high speed.
- Open the door fully to release most of the spring’s stored tension before beginning work, then secure the track with clamps as a backup measure.
- Disconnect the safety cable running through the center of the spring, confirming the cable is not frayed, since this cable is what prevents the spring from becoming a projectile if it later fails.
- Unhook the old spring from the pulley and the stationary bracket at the rear of the horizontal track.
- Compare the old and new springs side by side to confirm matching length, coil diameter, and wire gauge before installing anything.
- Hook the new spring into the pulley system and stationary bracket, following the same routing as the original.
- Rethread the safety cable through the spring’s full length and reattach it securely at both ends.
- Lower the door slowly while watching both sides simultaneously to confirm even tension, then test manual operation before reconnecting the opener.
Because extension springs work in pairs and typically wear at a similar rate, most professional technicians recommend sourcing replacement garage door springs as a matching pair rather than mixing an old spring with a new one, since replacing only one when the other is several years old often leads to a second failure within months. This approach costs modestly more upfront but avoids a second service call soon after the first repair.
Testing and Adjusting After Installation
Installing the spring correctly is only half the job, because a garage door that operates roughly but not smoothly will place ongoing strain on the opener, cables, and rollers until it is properly balanced. Three checks confirm that changing garage door springs was done successfully:
- Cycle test: run the door through at least five full open-and-close cycles, watching for consistent speed and the absence of grinding noise on either side of the track.
- Safety reversal test: confirm the door reverses correctly when it meets resistance near the floor; a failure here after spring work usually means the opener’s force settings need recalibration, not further spring adjustment.
- Manual balance test: disconnect the opener and lift the door by hand to roughly waist height; a correctly balanced door stays in place with only light effort and does not drift open or slam shut on its own.
A garage door that passes all three checks is properly balanced and ready for regular use; one that fails any of them should not be left in automatic operation until the imbalance is corrected, since continued use under incorrect tension accelerates wear on every other component in the system.
Garage Door Spring Replacement Cost Guide
Understanding the realistic cost range for garage spring replacement helps homeowners budget accurately and avoid both underpaying for a rushed job and overpaying for unnecessary extras.
| Service | Typical Cost (USD) | Notes |
|---|---|---|
| DIY parts only, single torsion spring | $30-$100 | Excludes tools if not already owned |
| DIY parts only, single extension spring | $20-$60 | Pair replacement recommended |
| Professional diagnostic/repair visit | $150-$400 | Covers labor and standard parts |
| Professional torsion spring replacement (pair) | $200-$500 | Most common residential job |
| Professional extension spring replacement (pair) | $150-$350 | Slightly lower labor complexity |
| Emergency/same-day service premium | \\+$50-$100 | Applies to after-hours or urgent calls |
Winding bars, clamps, and other one-time tool purchases can add $40 to $80 to a first DIY attempt, which narrows the apparent savings compared with a professional visit, particularly for a homeowner who will not reuse those tools again for years. Pricing tends to run slightly higher for an overhead door spring replacement on heavier commercial-style sectional doors, since these often use larger-diameter springs and a stiffer torsion tube than a standard residential setup. At Skyline Garage Door Repair, our standard diagnostic and repair service call runs $150 to $400 depending on spring type and door size, and we recommend a free in-home consultation whenever a homeowner is uncertain whether the spring alone is the problem or whether cables, rollers, or the opener also need attention.
Regional Considerations
Climate plays a measurable role in how quickly a garage door spring wears out, and the two states Skyline serves present very different challenges for spring longevity and door performance, so the right spring and door recommendation genuinely depends on where the garage is located.
Washington State: Moisture and Energy Code Factors
In Washington, the primary concern is moisture rather than heat, since the Pacific Northwest’s near-constant rain and humidity accelerate rust formation on unprotected springs, particularly in garages near Seattle and Bellevue that sit close to sea level with limited ventilation. A spring that develops surface rust loses tension over time and becomes more likely to snap without warning, which is why we recommend galvanized or oil-tempered springs with a protective coating for any replacing a garage door spring project undertaken in this climate, along with more frequent lubrication than a drier climate would require. Washington’s energy code also shapes door selection when a spring replacement is bundled with a full door upgrade, since the Washington State Energy Code requires garage doors with glazing to meet a U-factor of 0.31 for openings under 14 percent glazing or 0.34 for openings between 14 and 50 percent glazing.
Florida State: Heat, Humidity, and Wind Code Factors
In Florida, heat and humidity combine with heavy seasonal use to shorten spring life, since homeowners in Miami, Tampa, and Orlando frequently open and close their garage doors more often during hurricane season preparation, pushing springs toward their cycle limit faster and making a well-timed torsion spring garage door replacement especially valuable before hurricane season begins. Florida’s building code adds a further layer of complexity because any new door installation in a Wind-Borne Debris Region or High-Velocity Hurricane Zone such as Miami-Dade or Broward County must carry a Florida Product Approval or Miami-Dade Notice of Acceptance and pass large-missile impact testing under Florida Building Code Section 609.4, which affects the entire door assembly and its counterbalance system rather than the spring in isolation. A spring-only repair on an existing wind-rated door generally does not trigger these requirements, but replacing the full door alongside a spring failure does, which is a distinction our Florida technicians walk homeowners through before any quote is finalized.
Both states illustrate the same underlying principle: a spring’s rated performance shifts noticeably once local humidity, heat, and actual usage patterns are factored in, which is why we tailor spring recommendations by region rather than applying a single nationwide standard.
Preventive Maintenance to Extend Spring Life
Routine maintenance rarely eliminates the eventual need to learn how to replace garage door springs, but it does prevent the premature failures caused by rust, misalignment, and accumulated debris that shorten a spring’s lifespan well before its expected date.
- Lubricate springs, rollers, and hinges every six months with a silicone-based spray rather than household oil, which attracts less dust and holds up better in humid climates.
- Inspect coils visually for rust, gaps between coils, or stretching every few months, addressing any changes immediately rather than waiting for a full failure.
- Check and tighten mounting bolts and set screws periodically, since door vibration during normal operation gradually loosens hardware over time.
- Keep the garage door balanced by avoiding overloading it with additional accessories or aftermarket weight that was not accounted for in the original spring sizing.
- Schedule an annual professional inspection, which is also the ideal time to confirm correct garage door springs installation on any spring replaced within the past year, in addition to catching early wear on cables, rollers, and bearing plates.
A consistent maintenance routine typically adds one to two years of usable life to a spring that would otherwise fail early due to rust or misalignment, which represents a meaningful return on the fifteen minutes it takes to complete these checks every few months.
Frequently Asked Questions
How long does it take to replace a garage door spring?
A professional technician typically completes a torsion spring replacement in one to two hours, including inspection of related components, while a first-time attempt to replace garage door spring hardware often takes three to four hours due to the additional care required when working with unfamiliar tools.
Can I replace just one spring if only one is broken?
Technically yes, but most professionals recommend replacing both springs together even when only one has failed, since the surviving spring is typically close to the end of its own service life and replacing both prevents an uneven, short-lived repair.
Is it dangerous to operate the door or leave it partially open with a broken spring?
A garage door with a broken spring can slam down unexpectedly or become extremely difficult to lift, so it should not be operated manually or with the opener until repaired; leaving it in a fixed position and avoiding operation entirely is the safest option until a technician arrives.
What size torsion spring do I need for my garage door?
Spring size depends on door weight, track configuration, and headroom rather than door width alone, which is why measuring the existing spring’s wire diameter, coil diameter, and length, or weighing the door directly, is more reliable than guessing based on door dimensions before you learn how to replace a garage door spring on your own.
Do garage door springs need to match the door material, such as steel versus wood?
Springs are sized to the door’s total weight rather than its material specifically, so a heavier wood or insulated composite door requires a stronger spring than a lightweight aluminum door of the same dimensions, regardless of the material involved.
Should I attempt this repair myself if I have never done it before?
A first attempt is possible for a mechanically confident homeowner with the correct tools and a helper on hand, but the combination of stored tension and unfamiliar hardware makes learning how to change a garage door spring one of the higher-risk DIY projects in home maintenance, which is why many homeowners choose to have a licensed technician handle at least the first replacement.
Final Thoughts
Replacing a garage door spring is a manageable project for a well-prepared homeowner, but it carries genuine risk from stored tension that makes careful preparation, correct tools, and an honest assessment of personal comfort level just as important as the mechanical steps themselves. Whether a spring fails in a rainy Bellevue garage or during peak hurricane-season use in Tampa, the underlying principles of correct sizing, gradual tension release, and post-installation testing remain the same, even as regional humidity, heat, and code requirements shape the specific recommendations for each climate.
If you are weighing a DIY repair against professional service, or you simply want a licensed opinion before touching a wound spring, Skyline Garage Door Repair’s Washington and Florida teams handle everything from routine garage door spring repair to full door replacement built for your local climate and code requirements. Call Skyline Garage Door Repair for a free estimate, or schedule your free in-home garage door consultation today.